June 11, 2012

My Very Own Sewing Space


It's true! For the very first time I have a place to sew. A place where I can leave my sewing machine out and unfinished projects lying around to my heart's content. I'm so happy! Here's a little tour of the room.

The desk above was a free piece from my brother-in-law and sister-in-law. It was in the basement of the house they recently bought. I gave it a distressed paint job and added hardware. I wish I had a before picture to show you. She went from less than desirable to being a real keeper.


My sister Emily gave me these canisters as a wedding present. I quickly realized they were too small to hold four, suger, etc. well, so now they have new life holding stray ribbons, zippers, velcro and extra thread.


My Mom has had one of these for as long as I remember. I feel like I've made it in life now that I have a place to put one. All that thread so neatly organized makes my heart happy.


I resurrected this shelf from our basement. It was a dingy old thing that came with the house. You can see a "before" picture below. I gave it the same distressed paint job that I did on the desk. Now, it holds my stacks of fabric, some art supplies and a few sewing books.


It was so inspiring to pull out this fabric from my bins. There are so many projects just ready to be made!


I finally get to display my sewing books too. I'm especially proud of the "Better Homes and Gardens" book copyright 1970. My sister, Marie, sent it to me a long time ago. Its pictures and content are so vintage-y cool. I'm glad it's out of a bin and finally sitting proudly on a shelf.


Don't mind the mess of cords. I'm still working to tame them. These are the benefits of living in an old house where outlets are few and far between. I'll do my best to not start a fire.


In the other corner is the office space. I replaced the hardware with the same that I put on the sewing desk. I think it gives the desks a cohesive feel even though they don't match.

My friend Sara did the artwork. I love it. We used it to decide the color scheme for the room. Doesn't it look fabulous?


These are Jude's books, which I was too lazy to pull out of the room before taking pictures. They're in here because we're currently redoing his room and don't have a spot in there for them yet.


My grandpa made a table and chairs set for us when we were little and I'm lucky enough to inherit it! I can't wait to pick them up. They will go right here under the window and provide a perfect place for Jude and I to work in the same room together.

This is a picture of the room from the doorway. The bookshelf is to the left. My sewing table in the far corner and the office desk just to the right.


So, here's the lovely BEFORE pictures of the room. I should have taken a picture of my stuff in this space previously too. It looked like a scene from the show Hoarders. Something about bins of fabric and art supplies piled high in a dingy and dark paneled room screamed hoarder. We kept the door shut as often as possible.


One Saturday in April Jesse took down all the paneling and took it to the dump. Underneath it was glue and old paint. I spent a few weeks with a scraper in hand just scraping away. Of course, I could only do it for 60 minutes or so at a time before I was worn out and had to nap. Ah pregnancy. Everything takes twice as long as it should. Eventually, I sanded, we primed and then painted. The whole process took about a month.


And, lastly, a "before" picture of the shelves. Too bad you can't see the dirt and cobwebs. It was not a pretty thing. Surprisingly a scrub brush and a paint job makes it look rather functional. Three cheers for free furniture! (Jesse wasn't so happy about lugging it from the basement to the third floor though.) God bless that man.


Oh, and yes, that is our basement. It still looks like that. We'll get to that project eventually. I'm going to work on having a baby first though.

June 8, 2012

It's a GIRL!

Just yesterday we got to do the ultrasound of our little one. We were pleasantly surprised to find out it's a girl!
 

From the beginning of this pregnancy I've had an inkling that it was a girl. Which was funny because when I was pregnant with Jude I didn't have a feeling one way or the other. Early on I found myself more inclined to look at girly things or to plan a girly nursery. However, I was sure not to buy anything knowing I would jinx it if I did!

I'm excited, but a little anxious to have a girl. Will I know what to do with her? Will I know how to do her hair? We'll see. The good thing is they come out tiny and not opinionated, so that will help.


My belly button is popping out this time. I don't remember it happening last time although Jesse says it did. This little one seems to be much higher in my abdomen than Jude was. I wonder if that makes a difference. My sister-in-law said she always wanted her belly button to pop, but it never did. I can't say I have the same sentiment about it. I think it's kinda weird.

I bet you could guess that I've got a few things on the sewing list. I can't wait to get started! So far the list includes:
1. Oliver & S Sailor Pants
2. Peasant Dresses
3. Pleated Skirt
There will be more. That's all I was brave enough to pin before I knew her gender. The sewing machine will be humming soon!

June 3, 2012

Baby in the Hood Coat

Okay, here's more pictures of the adorable coat Auntie Em sent for Jude's birthday. She totally surprised me, and my goodness, I LOVE IT!


Like I said before, it's the Baby in the Hood coat from Anna Maria Horner's book, Handmade Beginnings. I'm afraid I would purchase this book for this one pattern alone.


Emily used blue and white striped seersucker for the main fabric and a textured white cotton for the contrast. The combo is so classic and perfect.


She says she used the 18-24 mo size and then added 2 inches to the body and sleeves. My Jude is a skinny little thing, so her alterations are absolutely perfect. I think we'll get lucky even and where it two summers in a row!


June 2, 2012

Dino Party

Jude turned two about two weeks ago. I threw together this little birthday party for he and his cousin, Lincoln. His cousin was born almost exactly the year before. They love to play together and Lincoln was excited to celebrate his birthday party with Jude. Jude, on the other hand, doesn't know the difference.


In the last 6 months or so Jude started to give a good "ROAR" anytime he sees a dino or something similar. Uncle Cory originally taught him this skill and he hasn't given it up. I love it, so I decided to use it as our theme.

When I originally showed him these invitations he looked carefully, paused and let out a good "ROAR". It was so perfectly timed I wish I could have caught it on video.


I derived the front of the invitation from an etsy seller, but I can't seem to locate them again. It's simple and easy. I added the red and white stripes to the back to match a tablecloth I already had on hand.


Three balloons for Lincoln and two for Jude. I ran across these little dino sippy cups at Menards of all places. They worked perfectly with the theme so I couldn't resist!


The party hats and the cupcakes were ideas from this gal. Her party was WAY cuter than mine. Great ideas over there.  You can't really see Lincoln's hat very well, but it has spikes along the back. He really wanted to "smile" for me and wouldn't turn around completely for me to see his hat. Funny boy. Anyway, they turned out pretty cute.


I think the cupcakes were my favorite. I picked up the mini dinos at the dollar store and then just made cupcakes from box mix. It's funny how piping frosting on the top makes them look like I worked hours on them! I didn't.


The boys enjoyed themselves thoroughly. The party was a bit chaotic, but we had a good time.


Happy birthday to you, Mr. Jude. You make us SO happy!

May 25, 2012

Look Who's Two


How old are you? Two

What did you get for your birthday? A John Deere tractor, tractor flashlight, cool Puma outfit, handmade drawings from Marshall and Jane, a basketball hoop, a water table, a tricycle, a baseball tee, a lawn mower, a sleeping bag and a new coat.

What is your favorite thing to do? Play with Daddy's iPad. Read books.

What is your favorite thing to eat? Bananas, yogurt and pizza.

What makes you happy? Playing outside. Playing with your cousins.

What makes you sad? An episode of Sesame Street where a character gets a pie in the face. Every time you immediately burst into tears.

What is your favorite show? You don't have a specific favorite, but we watch Curious George, Super Why and Cat in the Hat a lot.

What is your favorite song? Twinkle Twinkle Little Star. You've been singing it over and over again for 6 months.

What do you and mom do together? Play outside. Color. Cook.

What do you and dad do together? Wrestle. Tickle. Eat goldfish crackers.

P.S. Auntie Em made that coat. It's the Baby in the Hood Coat from Anna Maria Horner's Handmade Beginnings. It's killing me how cute it is. More pictures to come. Also, pictures of the birthday party coming soon too.

April 29, 2012

Spring Living Room

I'm working slowly to bring some spring into our living room.  I like to change things up with the seasons, apparently.

When we first moved in I changed the style of our photo collage in the living room.  I painted the frames white and I love how it flows with the matte in each frame.  Each January I sort through pictures from the previous year and add a new set.  Cheap thrill.

I also changed the layout of the photos.  In the last house you can see the collage here.  This time I used this inspiration from Martha Stewart.  Love that Martha.


I decided some spring pillows were in order.  The ones from the last house just did not match anymore.  We used them last summer after we had just moved in because it was all we had and they made my eyes twitch.  Too much.

The striped pillows are just scraps of home decor fabric I had on hand.  I pieced them together and came up with the stripes.

The blue came from a lovely linen fabric that Hobby Lobby has in their home decor section.  I couldn't take my eyes off the color.  I love it!  

I added some flower detail using the freezer paper painting method.  You know, my go-to method for just about everything!  The piecing took awhile to put together, but I think it was totally worth it.  The design came from this inspiration - found on Pinterest, of course.


Here it is in better light.  I made two of each pillow.


And, here's the look of our living room currently. 


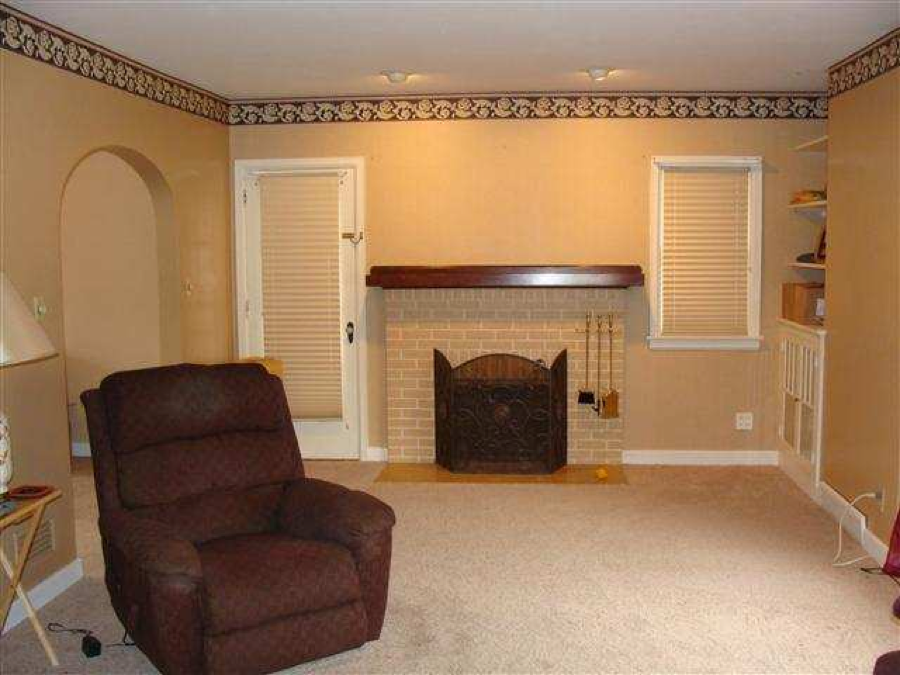
Still a work in progress, but definitely a step up from when we bought it 9 months ago.  This was a picture from the realtor's site and is the only "before" picture I have on this computer.


April 28, 2012

Spring Tops

I've been busy sewing a few tops for myself in these last few weeks.

There is a reason, you see, I'm carrying a sweet little surprise in my tummy (yay!) and wasn't ready to announce it publicly until two weeks ago.  So, some spring tops that hide a growing middle section were in order.

I started with Made By Rae's Spring Ruffle Top tutorial and I made a few modifications to it.  This gal made some perfect changes - eliminating the ruffle sleeves, minimizing some of the pleats and reducing some of the flare.  So, I followed her lead and made the same modifications.  I also ran across this picture on Pinterest and loved the style so much!  So, for this first top I just have one giant pleat in the middle.

Can you see it?  It's a little hard to notice with the pattern.  I may try this version again in a plain fabric.  I love the style - it's conservative in the top and hides a belly (whether pregnant or not!).  Plus, tank tops are a must around here in the summer time.  So, I'll try again with linen, I think.

Anyway, here's another version too.
This time I added just as many pleats as Rae suggests in her tutorial in the front.  I did eliminate the pleats from the back, though.

This fabric was on sale at Joanns  few years ago and I was so drawn to it.  I'm glad I picked it up because the color works well for me, I think.  Plus, it's a lovely voile type fabric that drapes so well.  I wish I had more! 

Here's the style of the top without the cardigan. 
I asked Jesse to take these photos of me outside.  Ha!  That poor man puts up with so much.  I did four outfit changes during that session so I could show these tops off.  It's not like he did it with a good attitude though, so I won't give him too much credit.

This little top I found on Pinterest.  What a great find!  Here's the tutorial over at Make It And Love It.
This one has become a quick favorite.  I found this nice coral/red interlock knit at Joanns and it's just perfect.  I love the stretchiness, the weight - fabulous.  This shirt came together in about an hour.  I very much recommend this tutorial if you need a quick addition to your closet.
Last, but not least, is a Circle Top.  I think I came across this tutorial over at Sweet Lemonayde when I was googling for spring top tutorials a month or two ago.

This one is like a circle skirt made into a top.  It requires only three seams total!  Very simple, and again, not a bad addition to the closet for a very small amount of fabric and time.
I'll probably do this one again, but I'll make the sleeves much longer - maybe long enough to hit the elbow.  It doesn't feel short when I'm wearing it, but after looking at this picture it's bugging me a little.

I submitted the coral dolman and the brown circle top into Made By Rae's Spring Top Sewalong - of course I added them at the last minute on the very last day!  It's my first bloggy sewalong contribution.  It was fun to enter and be apart of the group.  Over 400 people submitted tops this year.  If you need some inspiration for spring or summer tops the Flickr group is chock full of great ideas.

By the way, the pregnancy is going well.  We got to hear the heartbeat about two weeks ago and are anticipating the arrival of our new little one in October.  We're so grateful and excited!